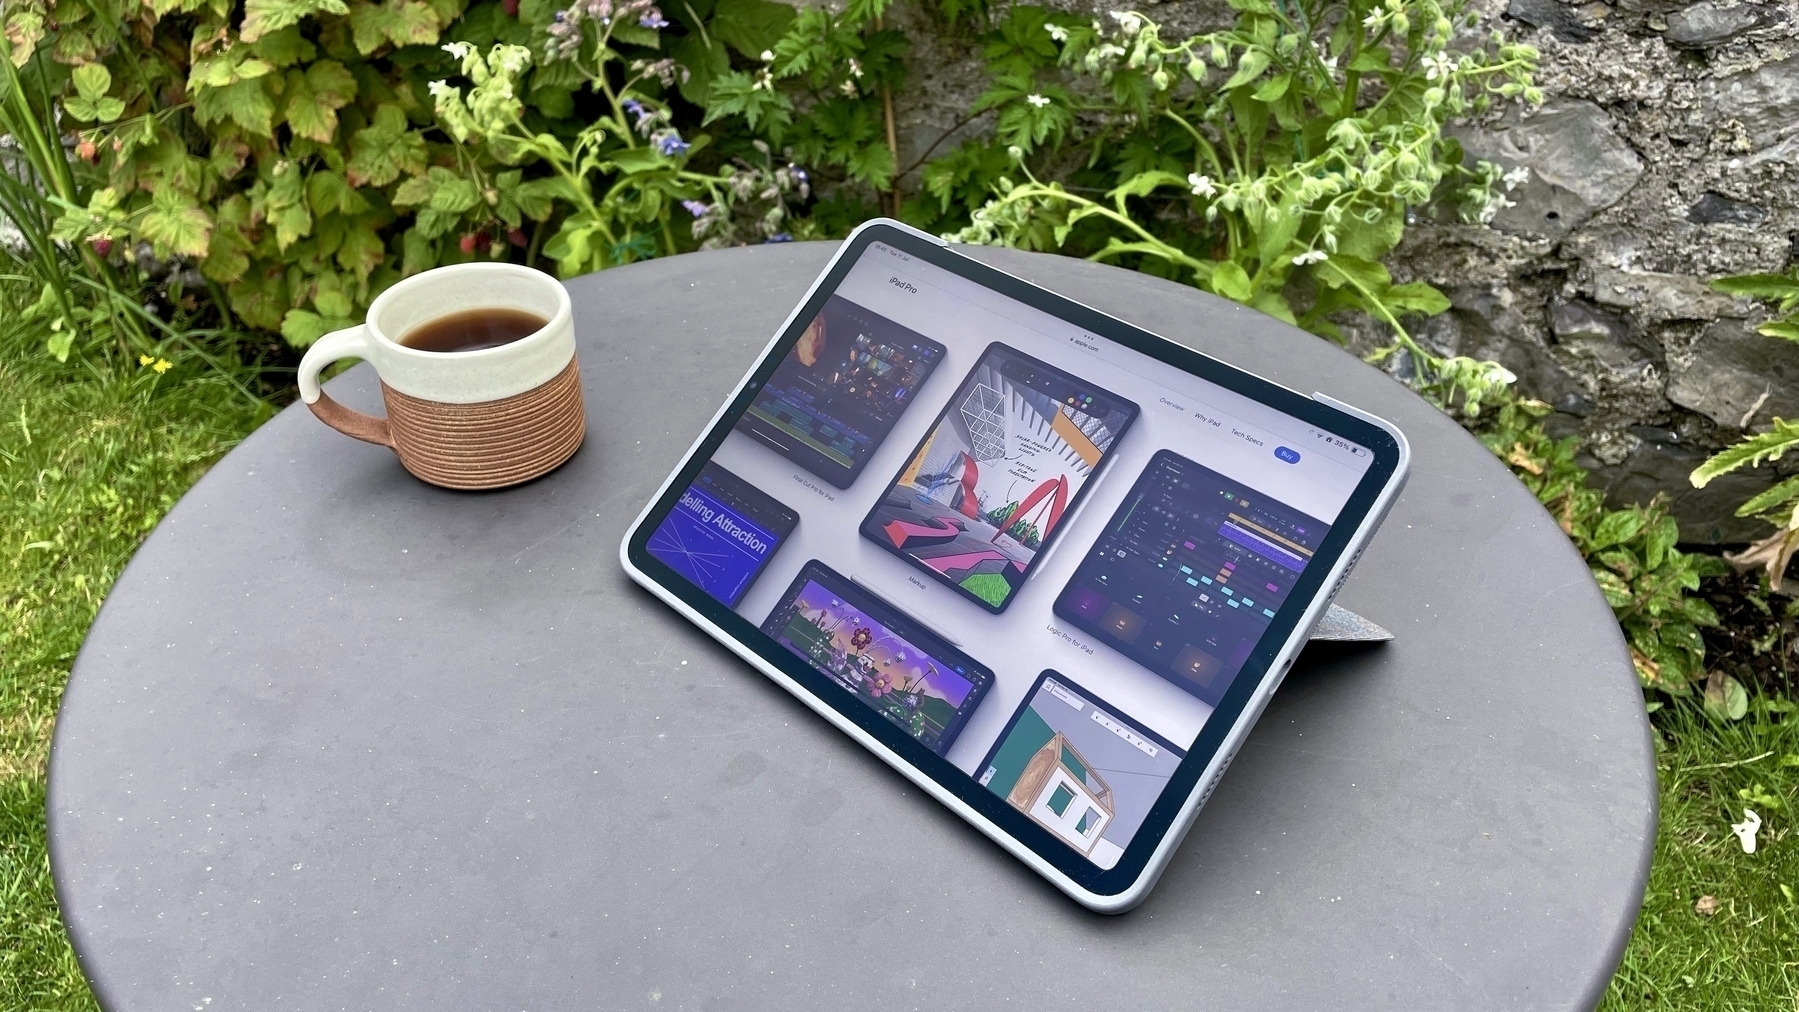
I needed a case for my new iPad Pro that offered protection for daily use and is still versatile enough for trips overseas where my MacBook will be staying at home as space is limited.
Although I do need to use a ‘proper’ computer for work (for now at least), I can manage on my iPad for short periods. I also prefer to use the iPad for non-developer tasks and dislike typing on the glass screen, so wanted a keyboard folio to give maximum flexibility.
I previously owned an Apple Magic Keyboard and whilst the typing experience was good, using it day to day was awkward. If you need a keyboard that never leaves your desk, then it makes an excellent accessory. The problem comes when you need to take the keyboard with you, but don’t need to use it all the time. Then begins the ridiculous dance of getting the iPad and Magic Keyboard combo out of your bag, unfolding it, and pulling on the magnetically attached tablet, folding up the keyboard with its stiff hinge one-handed and putting that back in your bag. You’re then left with a naked iPad that has no protection and no way to prop it up. The solution is to carry the Apple Smart Folio with you and use that alongside. Unbelievably, I did this a few times and it got ridiculous quickly.
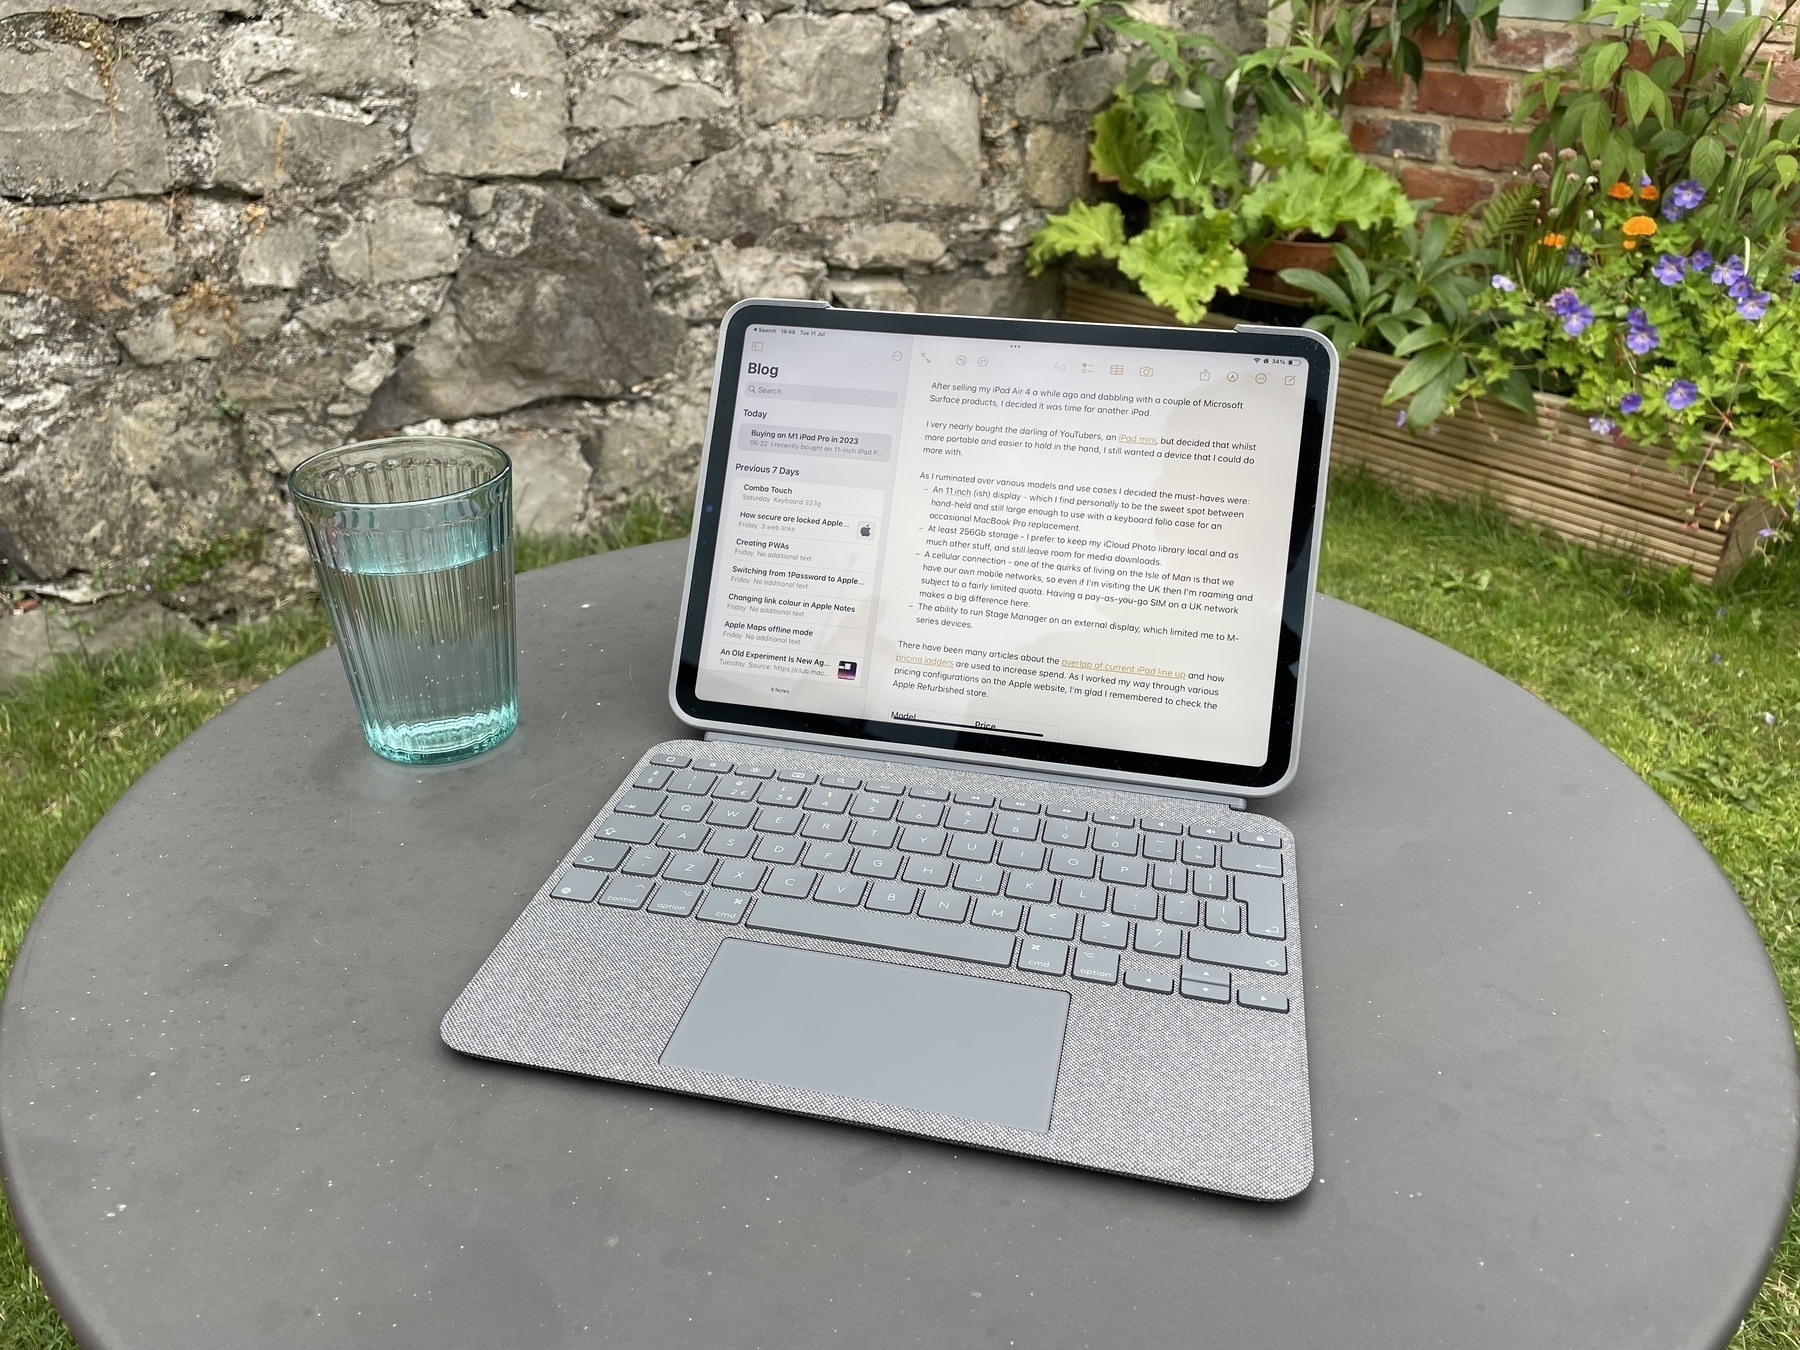
In between owning iPads, I had a Microsoft Surface and loved how the kickstand and detachable keyboard made it into such a flexible device for both work and leisure. So, this time around, I was drawn to the Logitech Combo Touch. It’s cheaper than the Magic Keyboard and for me offers a good, if not better, experience when you consider the whole package.
Of course, on an 11” device the keyboard is going to be a little cramped, but the Combo provides an excellent typing experience and I’d say it’s on par with the Magic Keyboard. It uses the pogo pins to connect and doesn’t require a Bluetooth connection or its own power, so you never need to worry about charging. It’s backlit for late night typing and an advantage over the Magic Keyboard is that you get the extra row of function keys. My only gripe with this is the Home button at the top left. I wish this were switched to the right-hand side in place of the Lock button, leaving room for a real Escape key instead. To get around this, I’ve mapped the Caps Lock key to Escape in settings, which isn’t so bad once you get used to it. I also appreciate that the keyboard sits flat when open, unlike the Surface keyboard that can stick to the screen. This avoids the whole keyboard deck bouncing on every key press and makes everything feel much more solid.
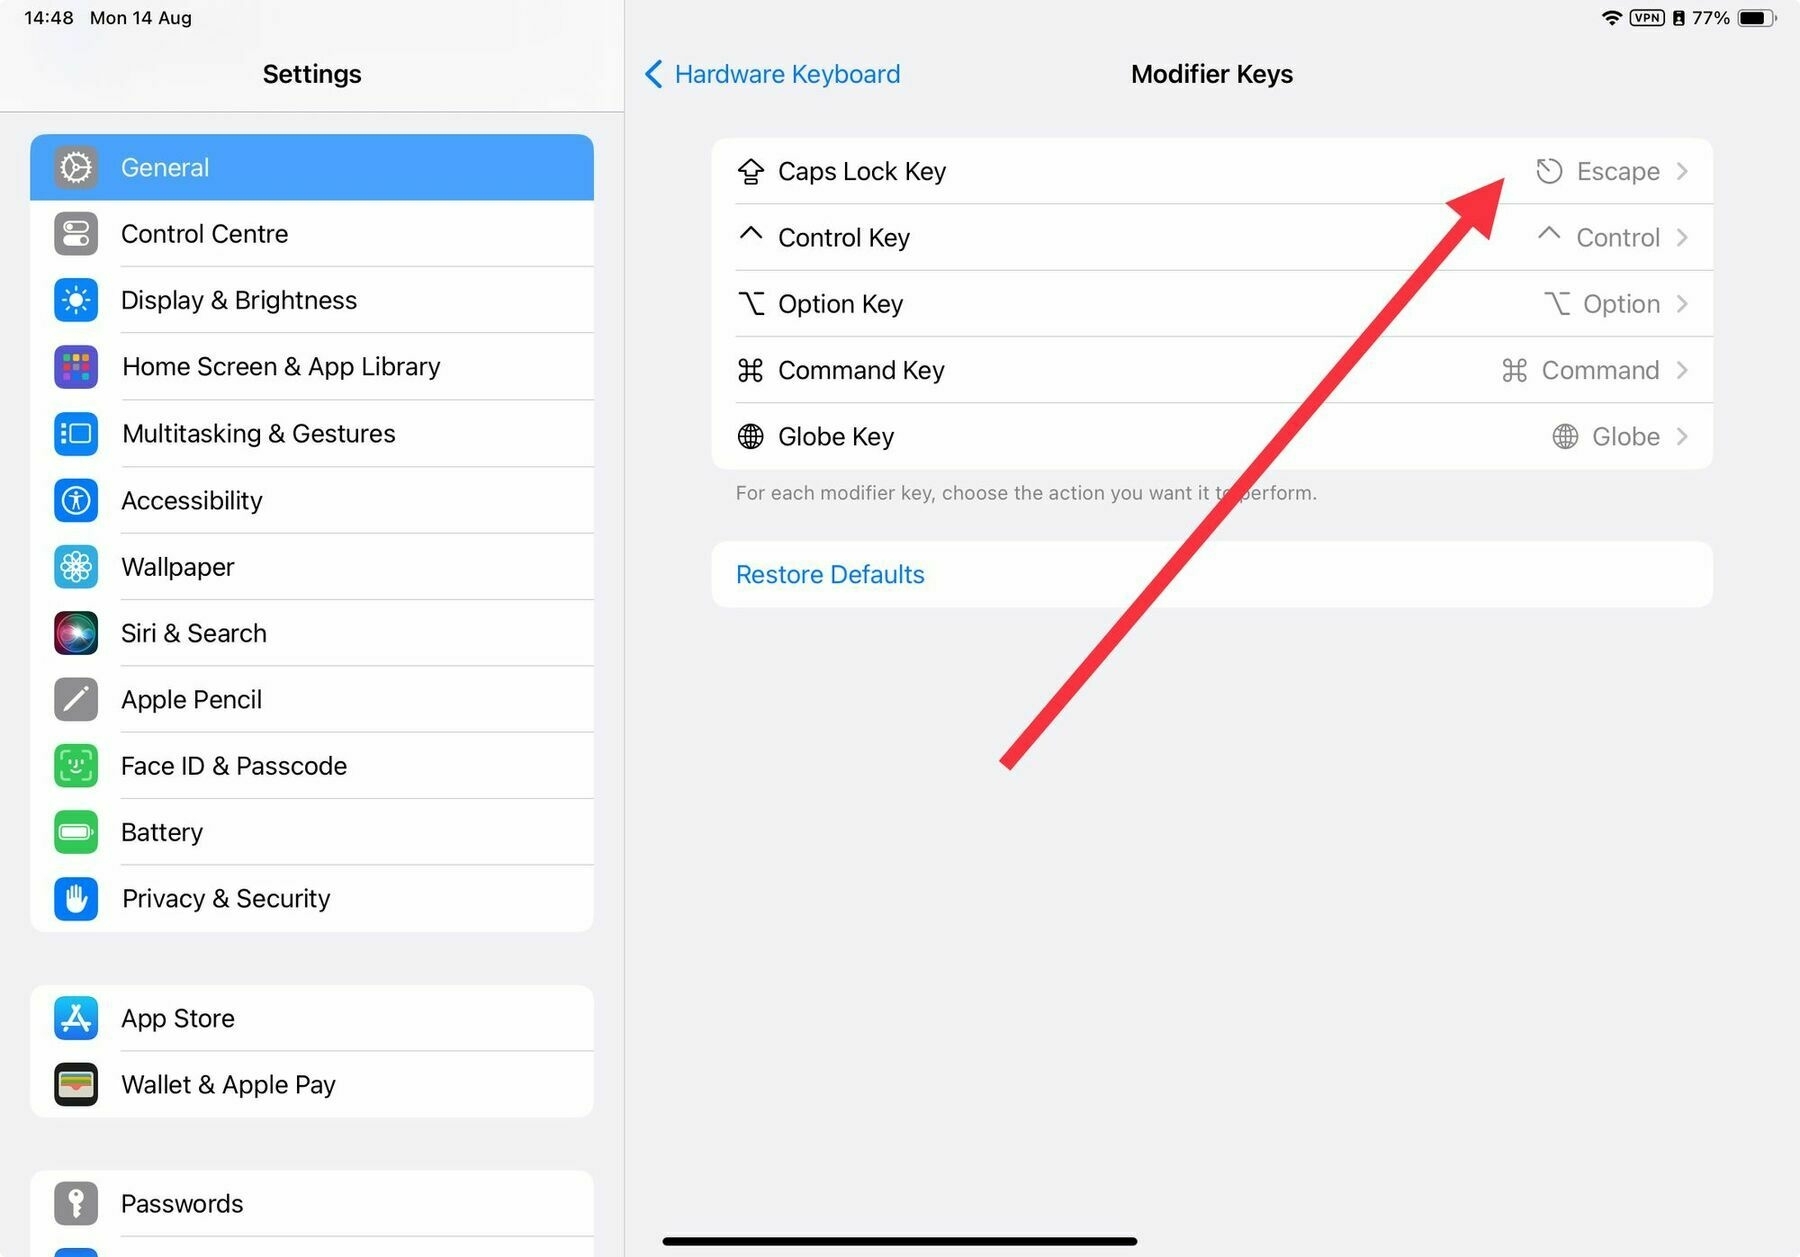 Mapping the Escape key to Caps Lock in Settings > Modifier Keys
Whilst you can detach the whole iPad from the Magic Keyboard, the signature feature of the Combo is that you can remove the magnetically attached keyboard and use the iPad with just the kickstand or fold that away and use it in your hand. If you don’t have a place to put the keyboard, this can be flipped around and attached back on, meaning you don’t feel the keyboard when holding it. Although this does make it heavier.
The trackpad is slightly bigger than the one on the Magic Keyboard too and does the job nicely handling clicks anywhere on its surface and iPadOS. The click requires a bit more force than I want to use and is a bit noisy for late night writing sessions so I’ve turned on Tap to Click in the Trackpad settings and increased the speed a little. Otherwise, it’s simply fine.
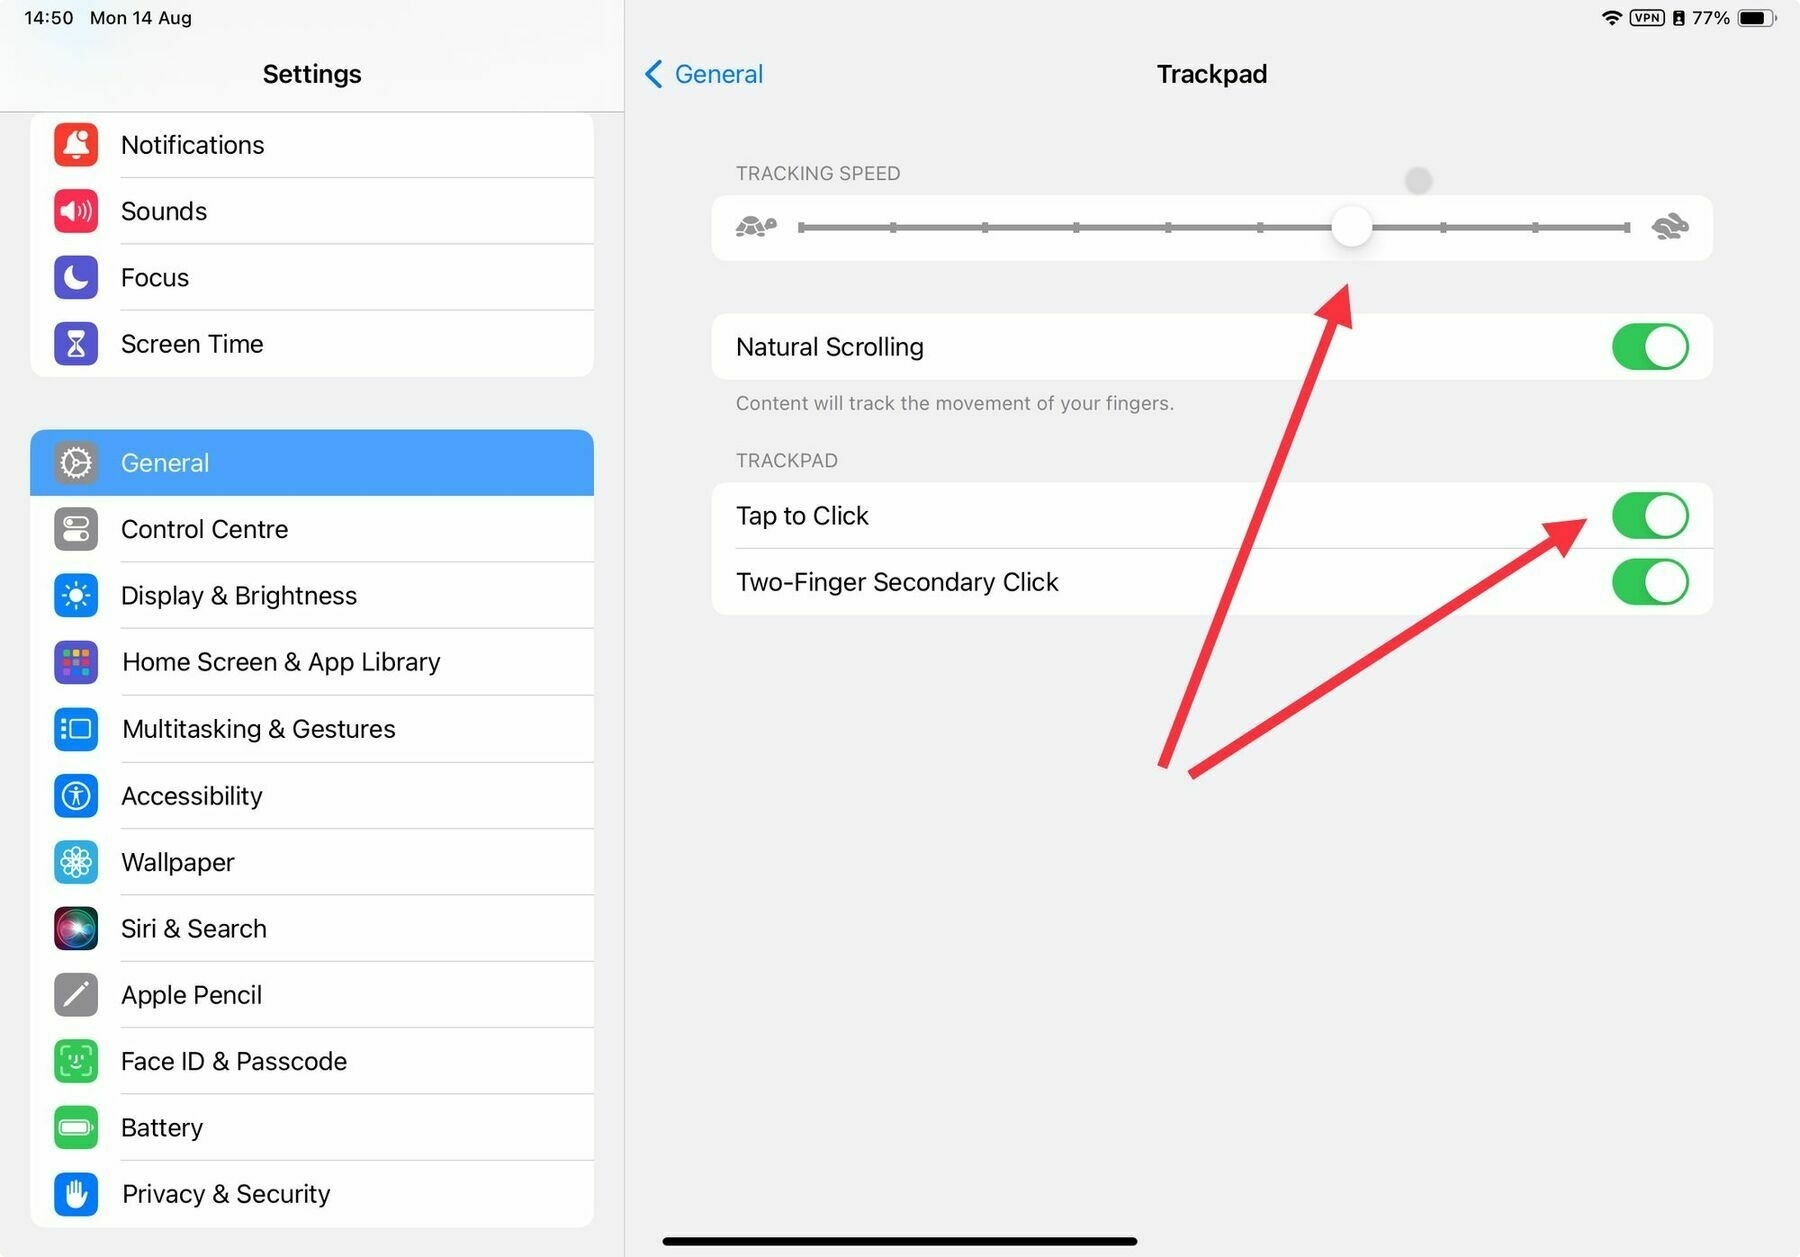 Increase speed and click options for the Trackpad in Settings
The hinge on the kickstand sits in the middle, so the whole flap is not as sturdy as the one on a Surface. I’m also not sure what it’s made of as it’s disguised by the cover fabric, but it does feel a little flimsy. I make a point of pulling it out in the centre to apply the opening force close to the hinge. It allows the iPad to sit at a wide range of angles from almost 60 degrees right down to 10 degrees. A negative point here, again due to its slightly flimsy nature is that on a slippery surface applying pressure to the screen does cause the hinge to bob around a bit. This doesn’t bother me because I’d use the iPad completely flat if I were to use an Apple Pencil. I tend to use the kickstand when I’m watching content or typing, so will only make the odd jab at the screen.
Whilst the Apple Magic Keyboard ergonomically elevates the iPad over the keyboard and brings it closer to your eyes, the Logitech sits it at desk level and further away. I don’t really mind this as it’s what every other laptop does, and more importantly, it avoids a problem I had sometimes hitting my hands on the bottom of the iPad when reaching for the numeric keys under the overhang of the Magic Keyboard.
One of the main attractions of this case is that whilst it fully covers the front and back of the tablet, there’s a rubber bumper running all the way around the edges (save for a cutout to allow Apple Pencil attachment). This gives me more confidence when the device is in a backpack that it won’t get scratched and although I hope I never find out, some drop protection on those vulnerable corners. The back of the case is easily thick enough that the camera bump is not an issue so there’s no wobble when you put the iPad on a table. The keyboard cover activates the iPad’s sleep/wake function and magnetically attaches when closed so it doesn’t slide and there’s no chance of it flopping open on its own. There also seems to be enough of a gap that the keyboard doesn’t leave an impression on the display when it’s closed. Something I noticed on my Surface devices.
I rarely, if ever, have this on my lap or a soft surface so any complaints I’ve read about the instability and length of the device in its keyboard mode are a non-issue.
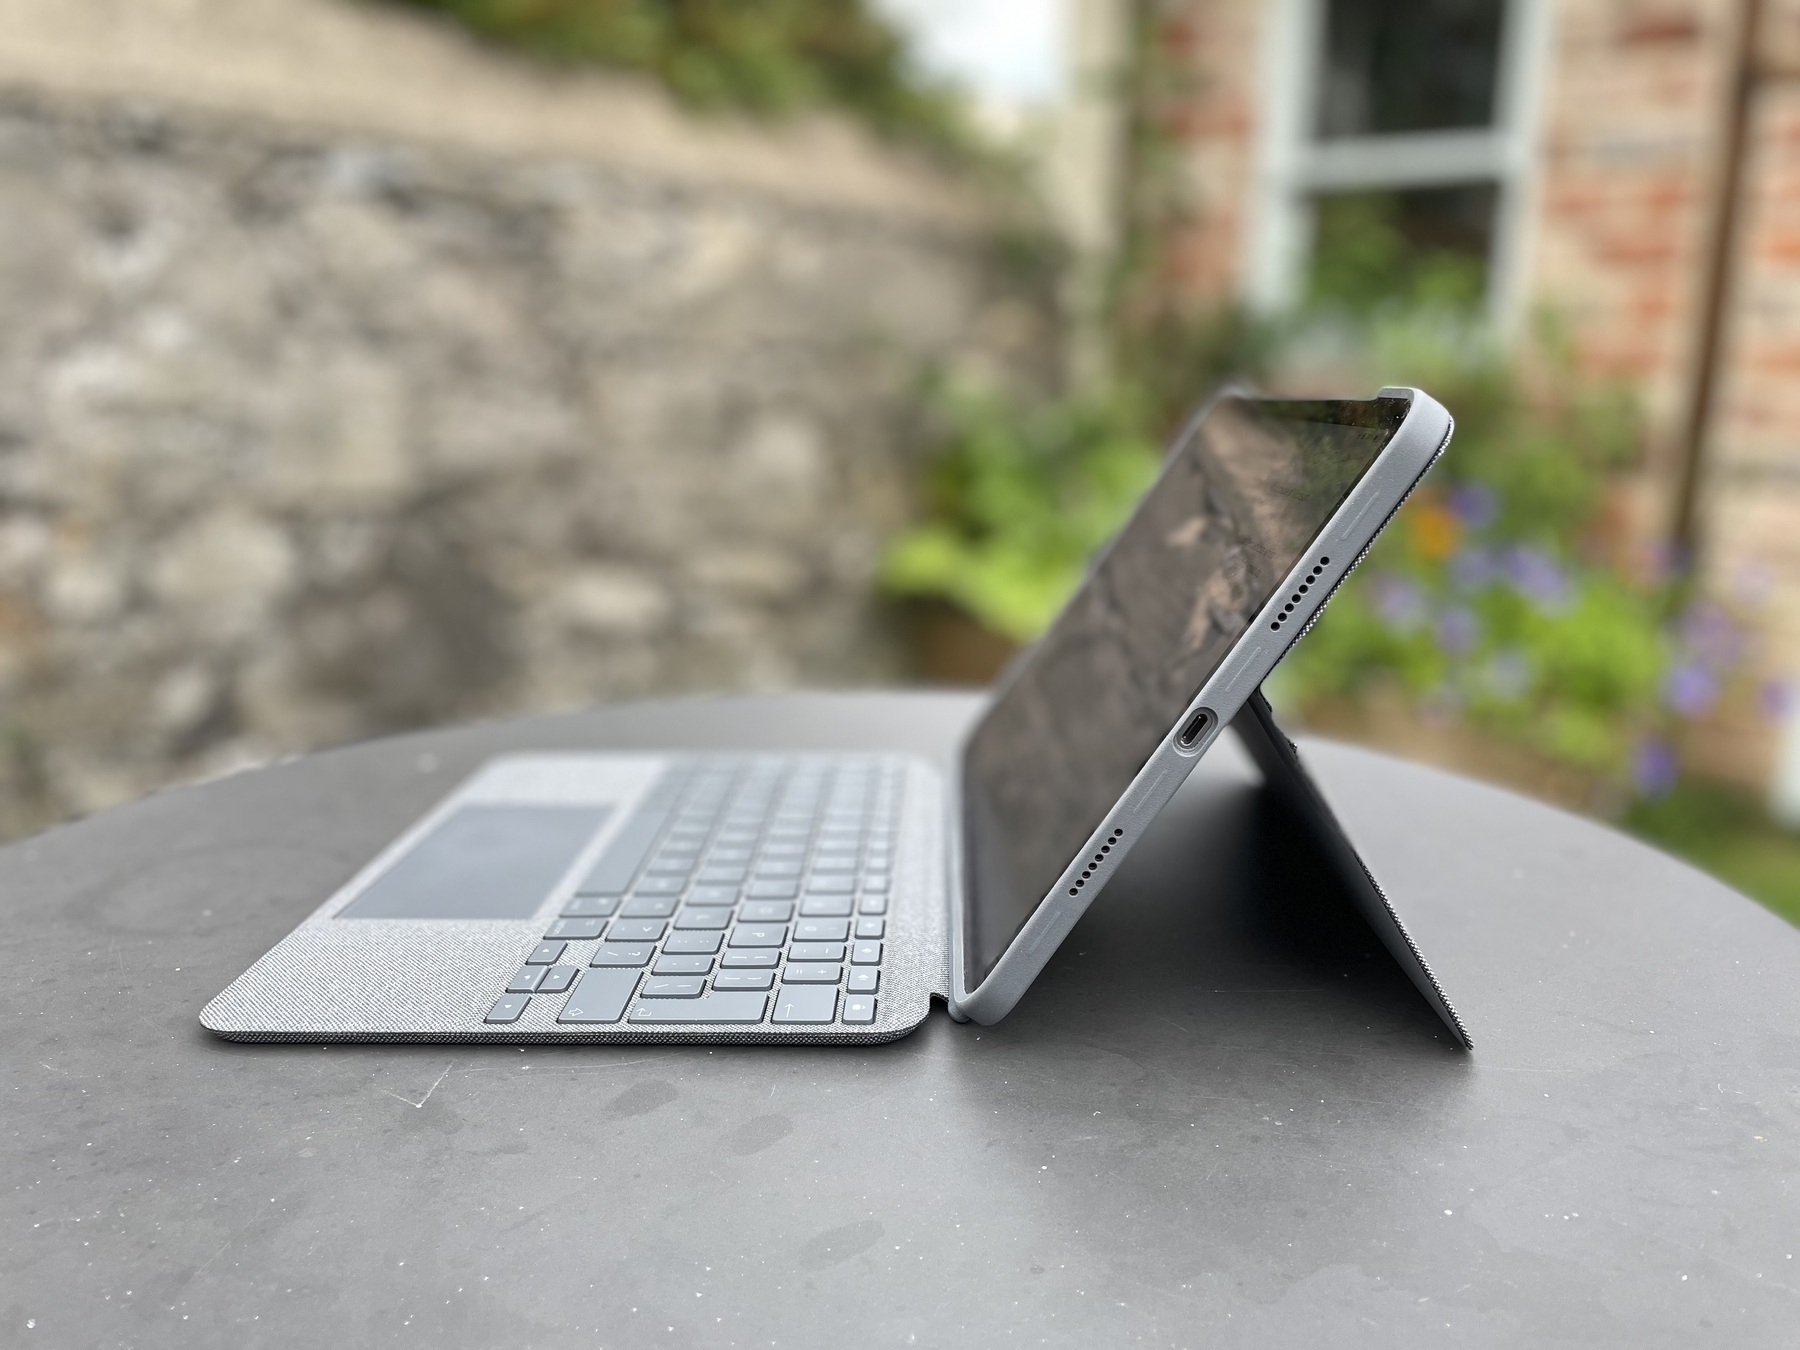 Side view of the iPad and Logitech Combo Touch showing kickstand
Overall, the Logitech Combo Touch feels more discreet than the Magic Keyboard when in public and the outer fabric doesn’t attract greasy fingerprints in the same way. Its slightly grippy woven fabric is nice to the touch and feels premium. I do have a concern whether the crease around the hinge will start to wear, but only time will tell. The tight design and strong magnets do have the slight drawback that it’s not the easiest to get into as there aren’t any indentations around the case, so you are required to prise it apart along the seam. It’s fine once you get used to it, but it’s no one-handed opening experience.
There’s no doubt that this is a heavy case. However, because you can detach the keyboard, you can reduce the weight by more than half if you’re holding it in your hand. Here’s a summary of the weights. I weighed my wife’s iPad mini in her folio case for comparison.
Comparing weights of the Combo Touch
- Logitech Combo Touch – 568g
- Back section including kickstand – 245g
- Keyboard – 323g
- iPad Pro 11" + Logitech Combo Touch back combined – 715g
- iPad Pro 11" + Apple Smart Folio – 767g
- iPad mini in folio case – 500g
I no longer have one to test myself, but a quick search showed that the Apple Smart Folio weighs in at 297g, which is heavier than using the Combo with keyboard detached.
Conclusion
One month into using the Logitech Combo Touch including a week overseas and does it deliver? Is short, yes. I feel confident that my iPad has sufficient protection for travelling, the keyboard is great and gives me a nice alternative to using my MacBook Pro for typing. The kickstand provides a stable base for when I just want to watch something. I look forward to seeing how it performs longer term.
 macos Print dialog showing the Edit Menu option on the PDF dropdown
 Add Evernote to the Print dialog
 Library / Keyboard Layouts folder
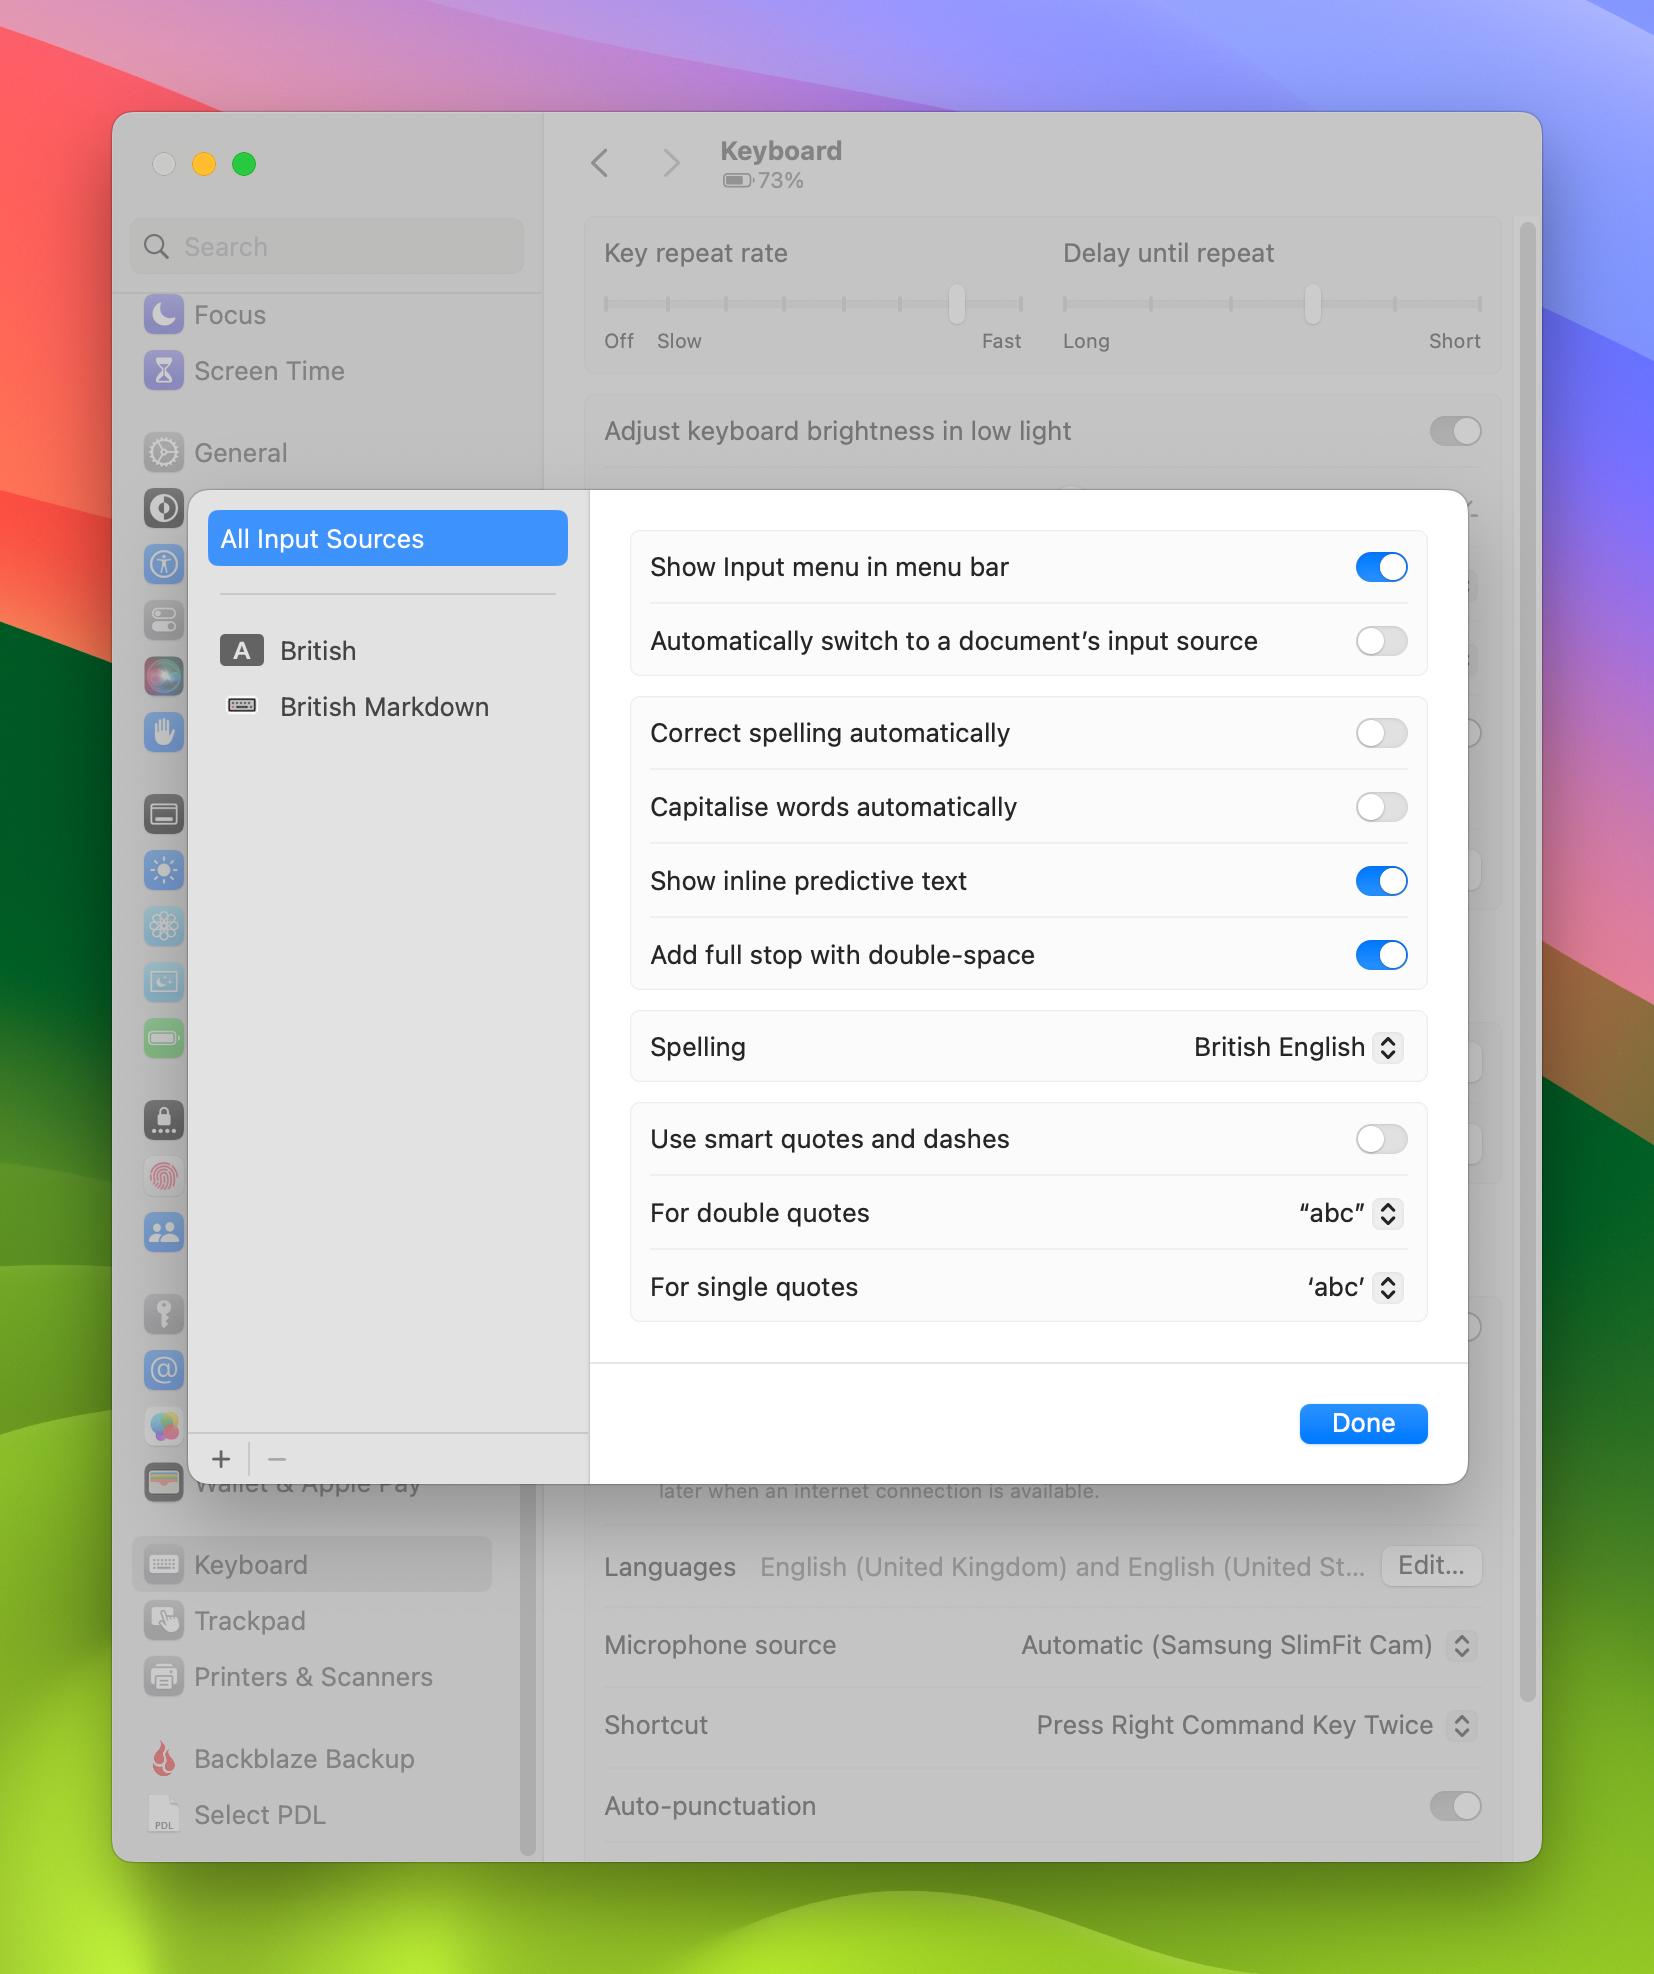 System Settings > Keyboard Input Sources
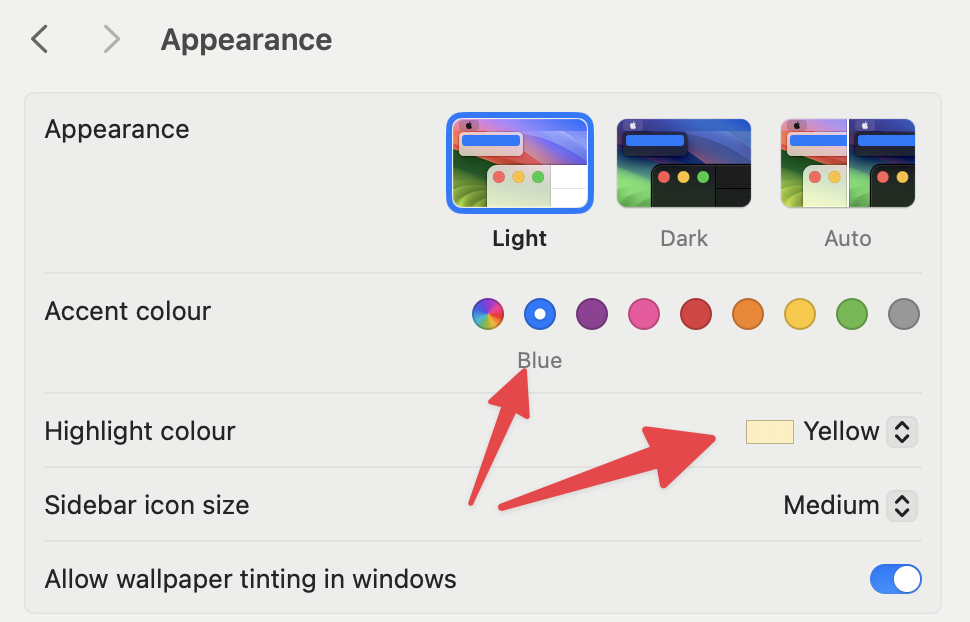 Change the Accent and Highlight colours
 Much Better!
 Once you change it, the original setting just looks wrong
 Screen capture of the WebAIM Contrast Checker